Changing Backup Location in Preferences
You can change the default backup location for your entire system database, including your returns. The new location will only be used for backups created after the change was applied.
Existing backups will not be moved to the new location automatically. If you want existing backups to be stored in the new location, the files must be moved manually. See Manually Moving Files to a New Location.
External Hard Drives: If you are using an external hard drive as your new backup location, the external drive must be physically connected to the server.
To change backup locations:
- Do one of the following:
- Click the Preferences button on the toolbar.
- From the Return Manager, E-file Manager, or Bank Manager, click the Options menu; then, select Preferences.
- From Rollover Manager, click the Tools menu; then, select Preferences.
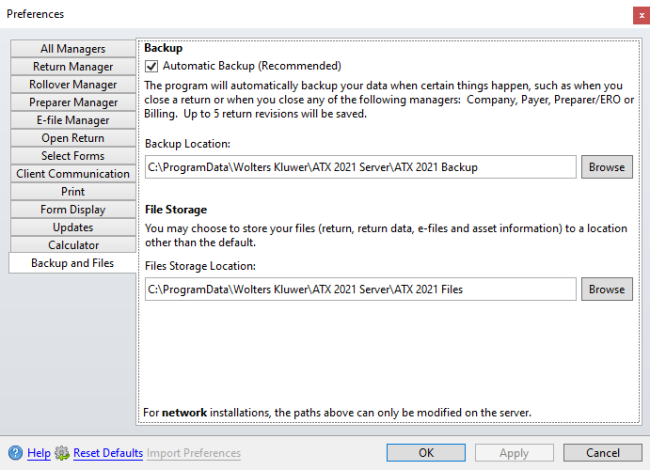
- Click the Backup and Files tab.

Preferences dialog box (Backup tab)
- Click the Browse button under Backup Location to navigate to and select a new backup location.
The storage locations can only be changed from Workstation/Server or Server Only (using Admin Console) for Network installs.
The new backup path must be a physical drive on the server or a fully-qualified universal naming convention (UNC) path to another location on the network. If you use a mapped drive for backups, it must be converted to a fully-qualified UNC path. For detailed information, see the Microsoft article on Naming Files, Paths and Namespaces.
- Click Apply and OK to close.
These locations can also be changed on the File Settings tab of the Admin Console dialog box.